Nikon Coolpix 8400: A Wide Angle Solution
by Stephen Caston on January 12, 2005 12:05 AM EST- Posted in
- Digital Camera
Playback Features
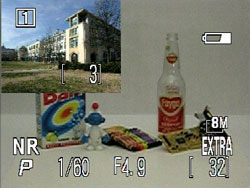
Quick review
To review previously taken pictures, you can either rotate the mode dial to Play or press the Quick review button while in a recording mode. If you press the Quick review button in a shooting mode, a small version of the last picture taken will appear in the upper left corner of the screen. Another press of the Quick review button will switch to a full screen version of the picture.
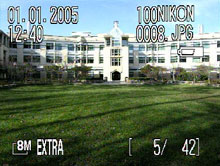 Image regular view |
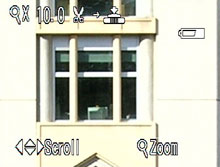 Image magnified 10x |
Quick zoom 3x
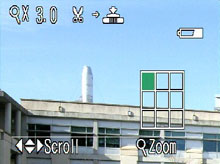
In the full screen review, you can magnify an image up to 10x. To do this, simply use the zoom controller to zoom in and out of the image. You can move to different areas of the image by using the multi-directional arrow pad. In addition, the 8400 offers a quick zoom mode that can be enabled by pressing the "enter" button. The image will be magnified 3x automatically. A grid will appear in the lower right indicating the area of the image in which you are currently viewing.
The 400 offers a "quick edit" option, which allows you to crop a JPEG image at anytime by pressing the shutter release button. For example, if you want to save a cropped version of an image, simply frame it the way you want it on the monitor/viewfinder by magnifying and panning. Then, press the shutter release button to save a copy of the image as you framed it. In Play mode, if the shutter release button is pressed while viewing an image full screen, one of two dialogs will appear. If you are viewing a JPEG image, a dialog will appear with two options: "Small pic." and "D-Lighting". The "Small pic." option allows you to save an image as a smaller picture. The exact size that it will use can be set in the menu. As explained in the user's guide, Nikon recommends using "D-Lighting" for images that need extra contrast or to brighten dark or back-lit subjects. If the image that you are viewing is a RAW file, pressing the shutter release button will bring up the option to convert the image to a TIFF file.
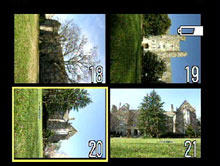 2x2 thumbnail |
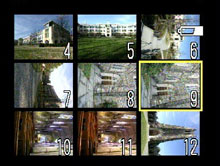 3x3 thumbnail |
When viewing an image at its original full screen size, pressing the wide angle side of the zoom controller will change the screen to a 2x2 thumbnail view. Another press will change the screen to a 3x3 thumbnail view. In the thumbnail views, the arrow pad can be used to highlight a picture. Then, the "set" button is used to view the image full screen. To skip through pictures a page at a time, you can rotate the Command dial left or right. To delete an image, you must press the Delete/Self-timer button. An image can be erased from full screen or thumbnail views. From Quick View mode, you can press the Quick review button again or half-press the shutter button to return to shooting.
 |
 |
 |
 |
 |
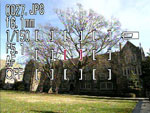 |
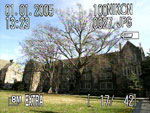
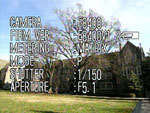
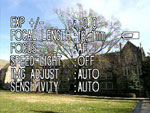
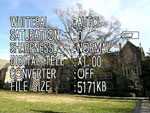
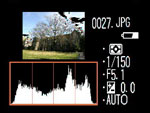
In both Quick Review and Play modes, there are 6 different displays of information available to the user. To cycle through these different information screens, the Command dial can be rotated left or right. In the 5th display, the thumbnail image flashes in highlight areas.
During playback in Play mode or full screen Quick review, a voice memo can be recorded by holding the Exposure compensation/Voice memo button. Voice memos are limited to 20 seconds and are recorded as WAV files with the same file number as the image. To delete a voice memo, simply press the Delete button and select the music icon.
The main difference between Quick review mode and Play mode is that in Play mode, the user has access to the menu options. The Playback Menu offers 2 "pages" of options outlined below:
| Playback Menu (1/2) | |
| Delete | Selected images, Erase all images |
| Folders | Folder options (New, Rename, Delete), Select |
| Slide show | Start, Frame interval (2, 3, 5, 10 sec.), Loop |
| Protect | Select |
| Hide image | Select |
| Print set | Print selection (Select), Delete print set |
| Auto transfer | Selected images (Select), All images, Cancel transfer |
In Play mode, you can choose to delete selected images or to erase all images on the flash card. There is a slide show feature that allows you to pick the length of time to display each picture as well as whether or not to loop the show. The Protect option lets you select images to mark as "protected". When images are protected, they cannot be deleted. However, they will be erased if the flash card is formatted. "Hide image" is an interesting option that allows you to select the images that you would like to hide from view during playback. This can be especially useful when arranging a slideshow of specific images. The Print set option allows you to print images when the camera is connected to a DPOF (Digital Print Order Format) compatible printer. "Auto transfer" lets you mark specific images or to select all images to be transferred automatically when the camera is connected to a computer.
| Playback Menu (2/2) | |
| Move image | Move |
| CF card format | No, Format |
| Small pic. | 640x480, 320x240, 160x120 |
With the "Move image" function, you can move images from one folder to another on the same flash card. The "Small pic." setting will determine the size of the new image when selecting the "Small pic." option (by pressing the shutter release button while viewing a JPEG file).


3 Comments
View All Comments
pigdog - Wednesday, January 12, 2005 - link
The return of the hairy hand!ShinGouki - Wednesday, January 12, 2005 - link
Oops I've noticed its Mr Caston that is the author of the review sorry for the mistaken identity.ShinGouki - Wednesday, January 12, 2005 - link
That you playing the guitar in those clips Anand?Don't suppose there's any hope you feel like starting a section on consumer to semi pro level audio recording hardware / software eg M-audio Audiophile or Terratecs DMX fire type cards not that Creative rubbish. Be nice to have anandtech quality reviews on that type of product and who knows might even cause them to release less buggy drivers if they are under more scrutiny.
*sorry for being totally off topic :), in other news its nice to see you continue with the camera reviews*